
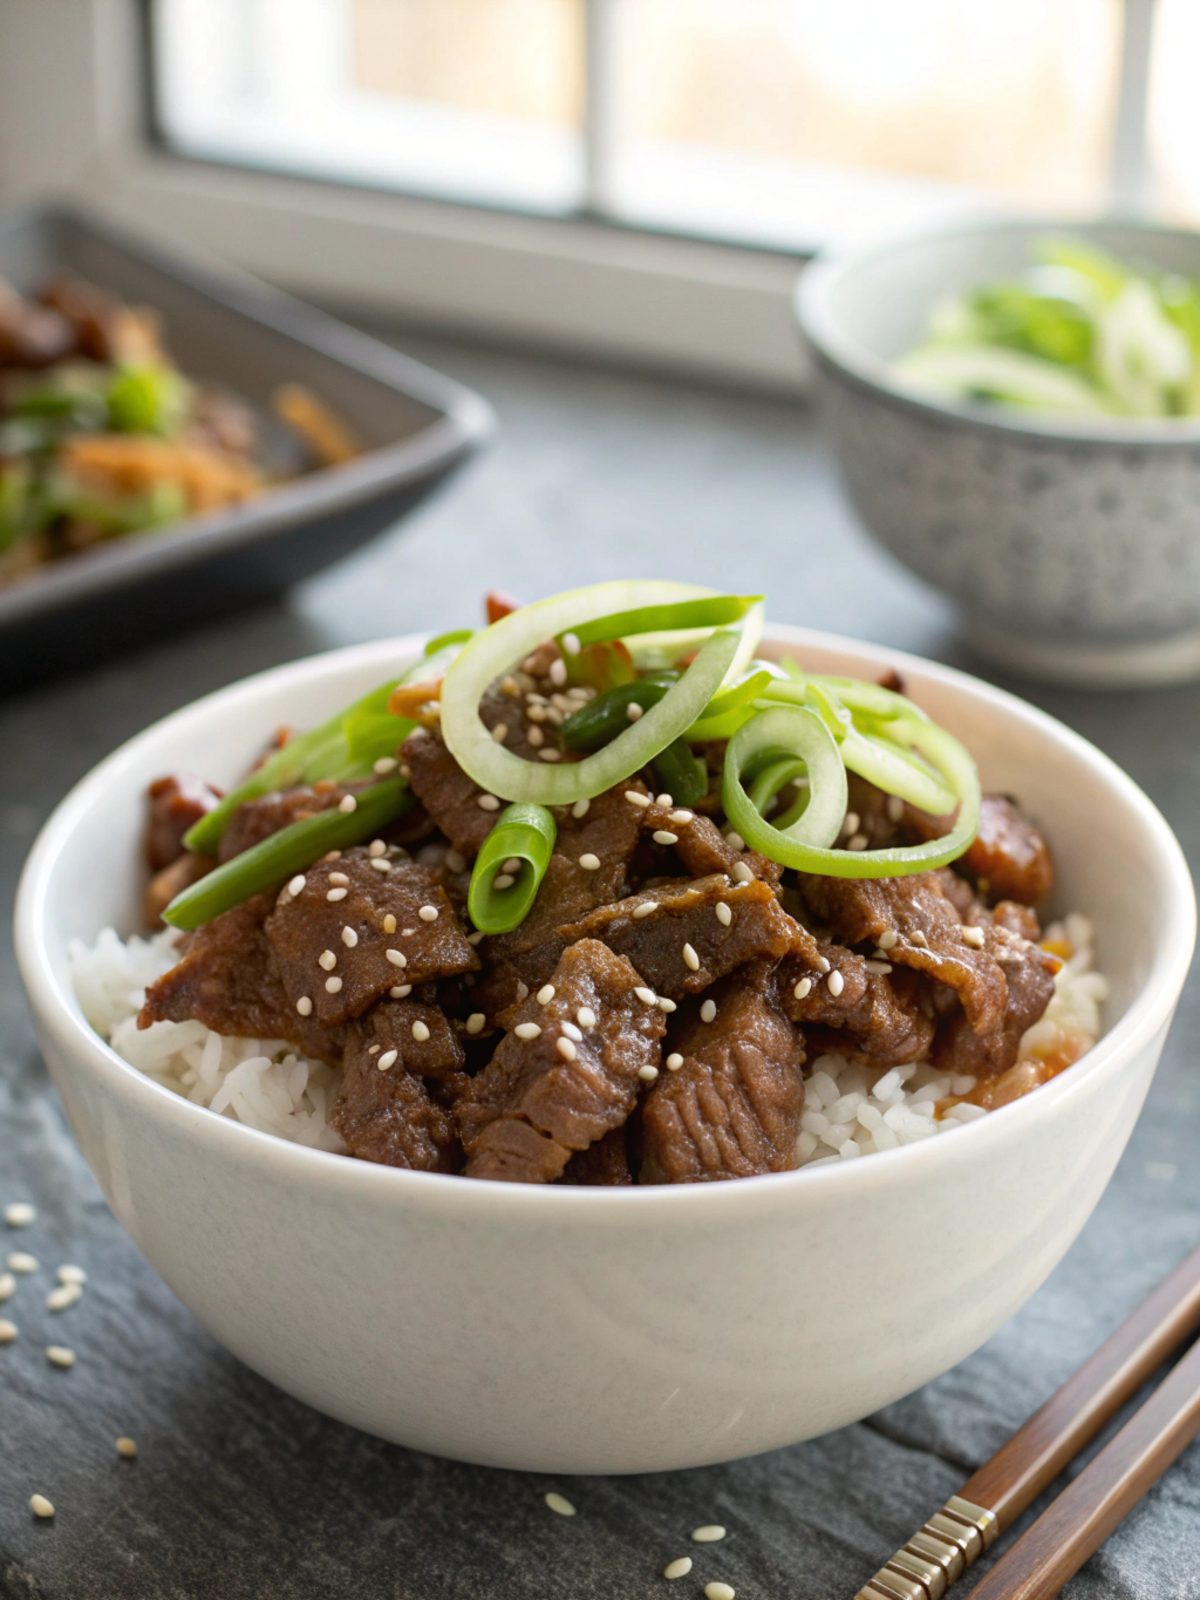
Craving the flavors of Korea? Our Korean Beef Bulgogi recipe is perfect for bringing the bold, savory, and subtly sweet taste of Korea to your dining table. This easy-to-follow recipe is perfect for both beginners and seasoned cooks looking to add some international flair to their culinary repertoire.
Ingredients
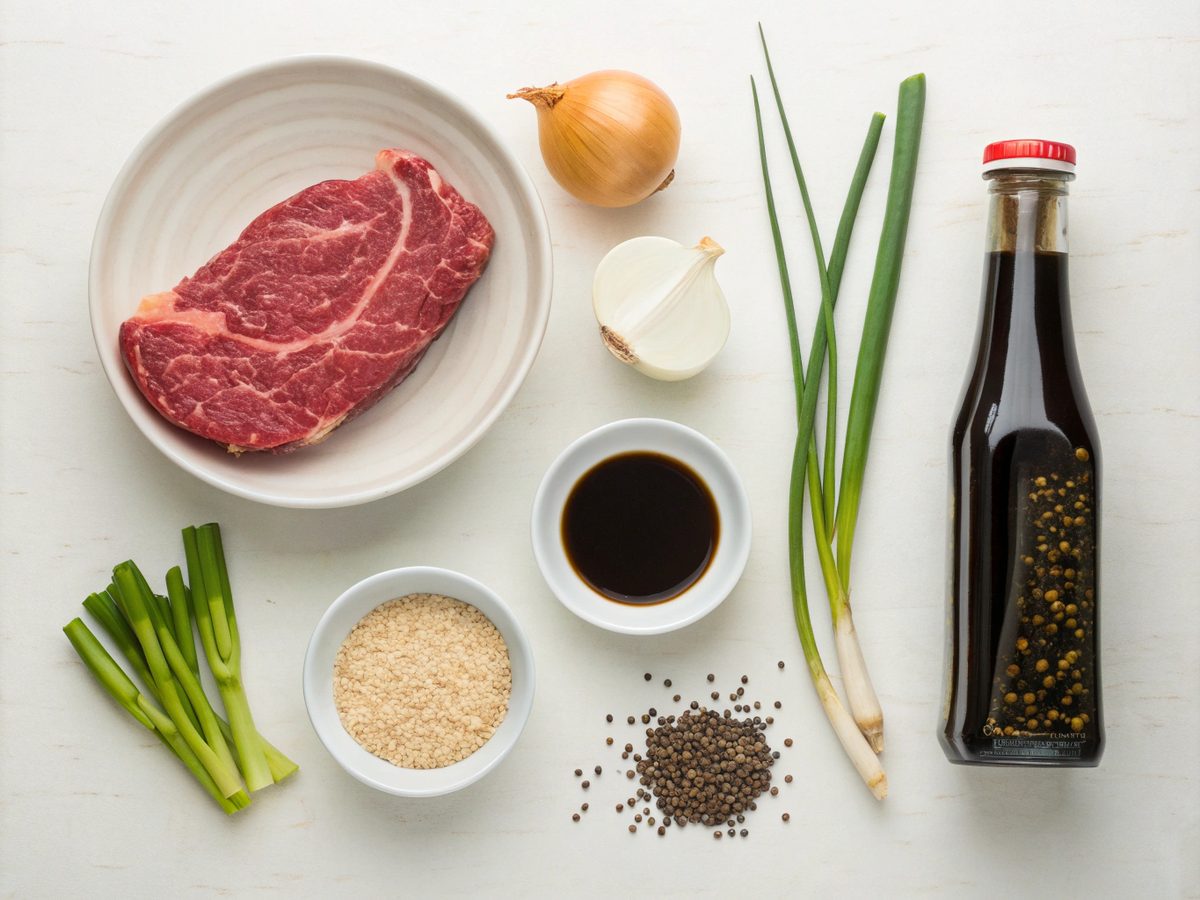
- 1 lb beef sirloin, thinly sliced
- 1/2 cup soy sauce
- 2 tablespoons sugar
- 2 tablespoons sesame oil
- 4 cloves garlic, minced
- 1 medium onion, sliced
- 3 green onions, cut into 1-inch pieces
- 1 tablespoon sesame seeds
- 1 teaspoon ground black pepper
Equipments
- Mixing bowl
- Frying pan
- Tong
How to Make Korean Beef Bulgogi – Step By Step
Step 1: Prepare the Marinade
In a large mixing bowl, combine the soy sauce, sugar, sesame oil, minced garlic, and ground black pepper. Stir the mixture until the sugar dissolves completely, creating a rich, tangy marinade that will tenderize and infuse your beef with flavor.
Step 2: Marinate the Beef
Add the thinly sliced beef sirloin to the marinade, tossing well to ensure every piece is coated. Allow the beef to marinate for at least 30 minutes, or overnight in the refrigerator for a deeper flavor.
Step 3: Prepare the Vegetables
While your beef is marinating, prepare your vegetables. Slice the onion and cut the green onions into 1-inch pieces. These will add a burst of freshness and a hint of sweetness to your bulgogi.
Step 4: Cook the Beef
Heat a frying pan over medium-high heat. Once hot, add the marinated beef, spreading it evenly across the pan. Cook for about 5 minutes, turning occasionally with tongs, until the beef starts to brown and caramelize.
Step 5: Add the Vegetables
Add the sliced onion and green onions to the pan. Continue to cook for an additional 2-3 minutes until the onions are tender and fragrant, blending well with the beef.
Step 6: Garnish and Serve
Once the bulgogi is cooked through, sprinkle sesame seeds over the top. Serve hot, garnished with additional green onions and sesame seeds if desired.
How to Serve Korean Beef Bulgogi
Serve your Korean Beef Bulgogi over a bed of steamed rice or tucked into a lettuce wrap for a low-carb option. Don’t forget a side of kimchi to complete the meal!
Recipe Success Tips & Suggestions
- Ensure your beef is thinly sliced for tender, flavorful results.
- For an authentic taste, try adding a grated Asian pear to the marinade.
- If you prefer a spicier dish, add some gochujang (Korean red pepper paste) to your marinade.
Pumped-Up Protein Korean Beef Bulgogi
Want to boost your protein intake? Simply add some sliced mushrooms or a serving of tofu to your bulgogi. Mushrooms will absorb the flavors beautifully while tofu provides a plant-based protein option, ideal for those who are vegetarian.
Low-Carb Delight: Korean Beef Bulgogi
Looking for a low-carb option? Replace the sugar with a keto-friendly alternative such as erythritol and wrap your bulgogi in lettuce leaves instead of serving with rice. This will help you enjoy the authentic taste of Korean bulgogi without the carbs.
Storage Instructions
Store any leftover Korean Beef Bulgogi in an airtight container in the refrigerator for up to 3 days. Reheat in a frying pan over medium heat, adding a splash of water if necessary to prevent drying out.
FAQs
- Can I use different cuts of beef for bulgogi? Absolutely! While sirloin is commonly used, ribeye or tenderloin work well as flavorful alternatives.
- Is Korean Beef Bulgogi spicy? Traditional bulgogi isn’t typically spicy, but adding gochujang to the marinade can enhance its heat.
- Can I freeze Korean Beef Bulgogi? Yes! Store it in a freezer-safe container for up to 3 months. Thaw in the refrigerator before reheating.
- What can I use as a substitute for soy sauce? If you’re avoiding soy, try coconut aminos as a great alternative that offers similar flavor.
Why You Should Try Making Korean Beef Bulgogi
This Korean Beef Bulgogi is not just a meal–it’s an experience! Whether you’re cooking for family, friends, or just yourself, you’re inviting a slice of Korean culture into your home. Try this recipe and share your thoughts in the comments below. Happy cooking!