
Welcome to cheesecake heaven! Whether you’re a baking pro or a newbie, making a cheesecake can seem daunting. But worry not, this step-by-step guide will lead you to the creamy, dreamy delight of your very own cheesecake. Not only will you get to bask in the compliments, but you’ll also reap the sweet rewards of your efforts with every delicious bite.
Ingredients
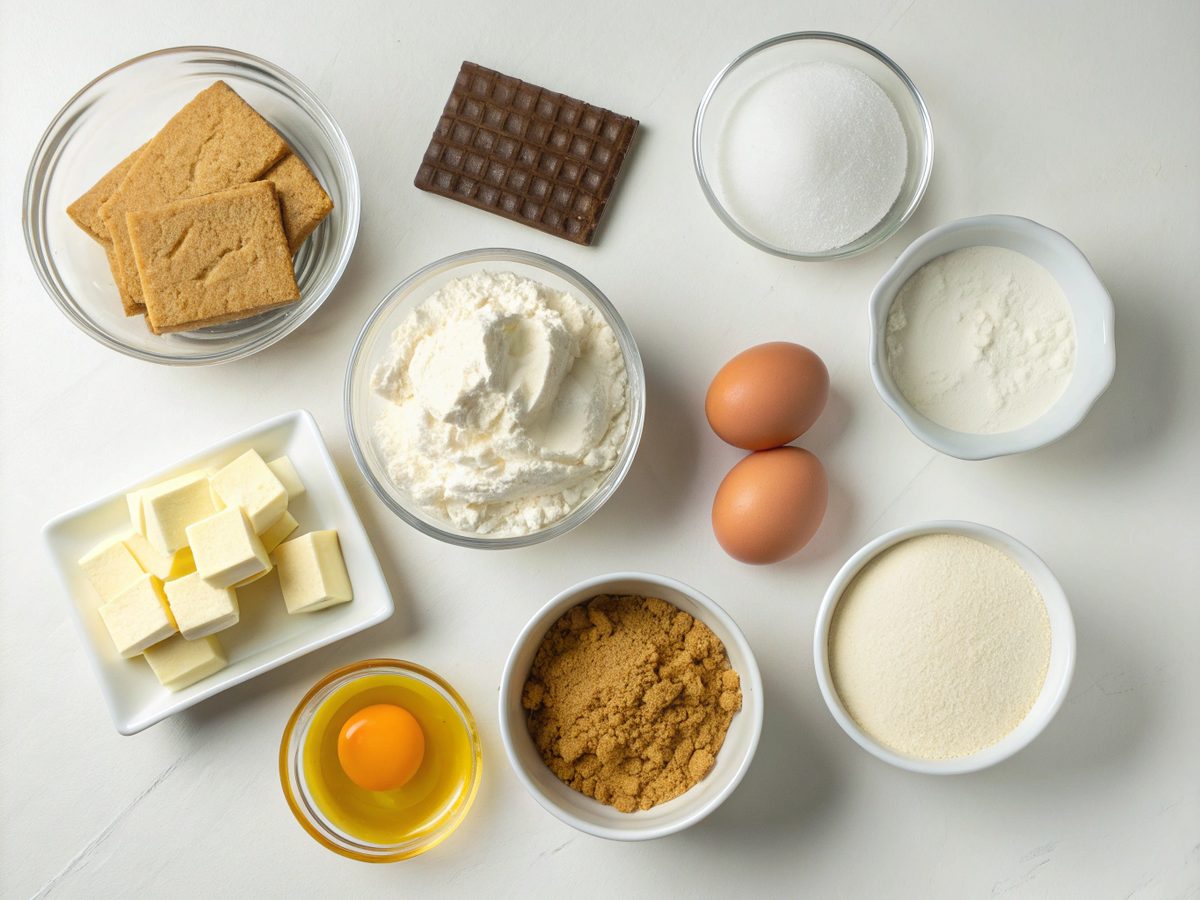
Let’s dive into the heart of our cheesecake preparation: the ingredients. Gather these essentials:
- 1 1/2 cups graham cracker crumbs
- 1 cup sugar
- 1/2 cup melted butter
- 4 (8 oz) packages cream cheese, softened
- 1 teaspoon vanilla extract
- 4 large eggs
- 1 cup sour cream
- 1/4 cup all-purpose flour
Equipments
Essential kitchen tools you’ll need:
- Springform pan
- Mixing bowls
- Electric mixer
- Measuring cups and spoons
- Spatula
- Baking sheet
How to Make a Cheesecake – Step By Step
Step 1: Prepare the Crust
Start by crushing graham crackers into fine crumbs. You can do this by hand using a rolling pin or opt for a food processor. Combine the crumbs with melted butter and sugar in a bowl, stirring until well mixed. This buttery mix should feel like damp sand. Press the mixture into the bottom of a greased springform pan neatly. The crust needs to chill for 15 minutes to harden slightly, setting the foundation for your cheesecake.
Step 2: Blend the Cream Cheese
In a large mixing bowl, beat the softened cream cheese until creamy and smooth, either using a hand mixer or stand mixer. This is key to achieving a silky texture in your cheesecake. Gradually add sugar while mixing, so it fully incorporates without creating lumps. Next, mix in the flour and vanilla extract. These additional ingredients will give the cheesecake structure and more flavor depth.
Step 3: Add the Eggs
One by one, add the eggs to the cream cheese mixture, thoroughly beating after each addition. The slow speed on your mixer helps avoid incorporating too much air, which can lead to cracks on the surface during baking. Each egg will contribute to the silky smooth texture of your cheesecake, creating a custardy richness that’s hard to resist.
Step 4: Enrich with Sour Cream
Now, it’s time to elevate the flavor. Stir in the sour cream until combined. Its tangy nature adds a subtle tartness, balancing the cheesecake’s creamy sweetness. Don’t overmix; gentle folding is enough. This step is crucial as sour cream’s high-fat content aids in setting the final texture beautifully.
Step 5: Assemble in Pan
Pour the cheesecake batter over the prepared crust, smoothing the top with a spatula. To prevent leakage, wrap the outside of the springform pan with two layers of heavy-duty aluminum foil. This assembly ensures the filling sits snug, ready for baking, while protecting the outer crust from burning during baking.
Step 6: Bake in a Water Bath
Preheat your oven to 325°F. Place the wrapped springform pan in a larger baking dish. Fill the dish with hot water about halfway up the side of the pan. This water bath method helps keep the cheesecake’s cooking environment moist and even, minimizing chances of cracking on the surface. Bake for about 1 hour and 20 minutes until the edges are set but slightly jiggly in the center.
Step 7: Cool and Rest
Turn off the oven, leaving the cheesecake inside with the door slightly ajar to gradually cool. This step prevents sudden temperature changes that often cause cracking. After about an hour, remove from the oven and cool completely on a wire rack. Chill in the fridge for at least 4 hours or overnight for best results. The cooling will enhance the flavors and set the textures perfectly.
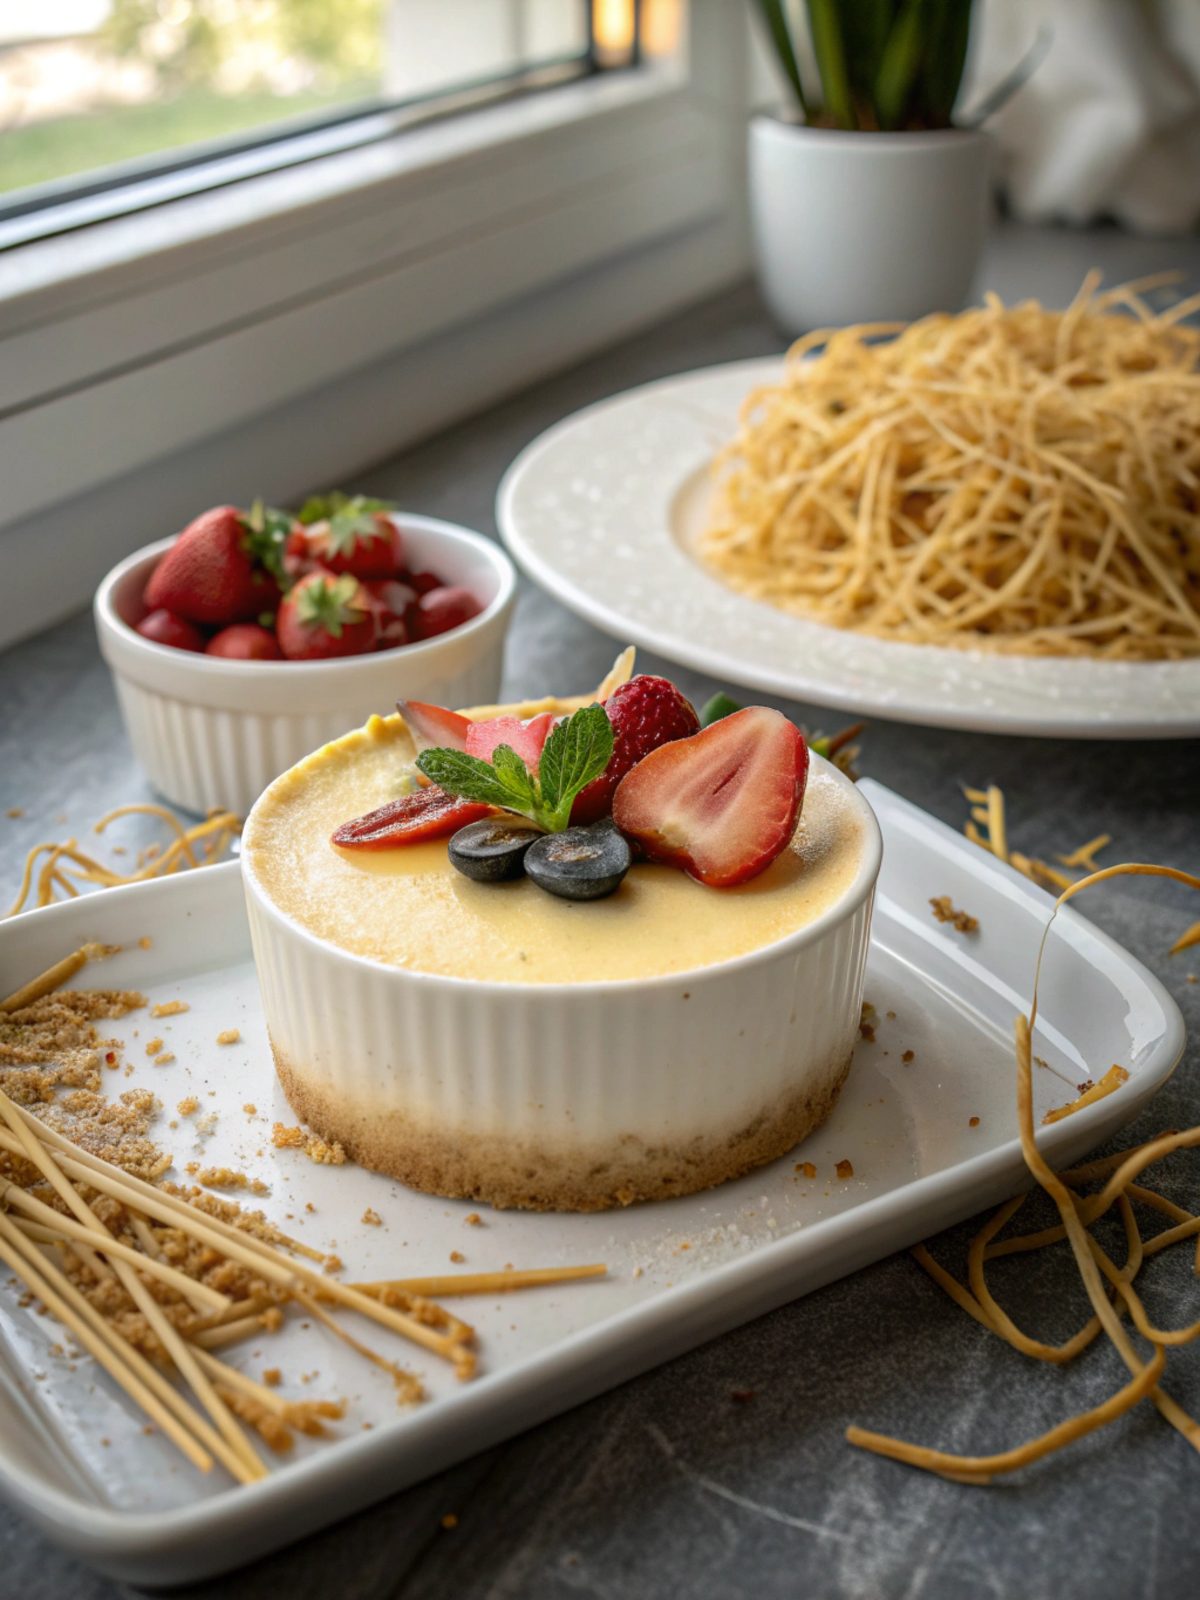
How to Serve Cheesecake
A cheesecake deserves to shine. Slice it with a clean knife, wiping the blade between cuts for neat pieces. Serve your cheesecake top-eded with fresh berries, a drizzle of chocolate sauce, or simply a dollop of whipped cream. Each addition not only adds to the aesthetic but plays well with the creamy texture.
Recipe Success Tips & Suggestions
Achieve cheesecake perfection with these tips: ensure the cream cheese is softened for smooth blending, avoid overmixing to reduce air bubbles, and bake in a water bath for even cooking. Chilling fully before serving will reward you with intended flavors.
Make It Guilt-Free with High Protein Cheesecake
For a cheesecake with a gym-friendly twist, try a High Protein Cheesecake. Substitute half of the cream cheese with Greek yogurt and add a scoop of your favorite unflavored protein powder to the batter. This version not only boosts the nutritional value but also maintains a rich and creamy texture. A perfect indulgence without the guilt.
Low Carb Cheesecake Delight
Low Carb Cheesecake is your answer if you’re counting carbs. Swap the graham crackers with almond flour for the crust and replace sugar with a natural sweetener like erythritol. This version keeps the creamy essence but with fewer carbs to align with a keto-friendly lifestyle, proving you can enjoy desserts without compromise.
Storage Instructions
Store leftovers in the refrigerator covered tightly with plastic wrap or in an airtight container. It stays fresh for up to 5 days. For longer storage, freeze individual slices, wrapping them separately in plastic and foil to retain freshness. Enjoy later by allowing them to thaw in the fridge overnight.
FAQs
- 🍰 Can I make a no-bake version? Absolutely, just set the cheesecake in the fridge without baking after step 5 for a cooler approach.
- 🕒 How long should I refrigerate my cheesecake? Aim for at least 4 hours; overnight is preferable for optimal taste and texture.
- 🏠 Do I need a water bath? It’s recommended to bake a cheesecake with a water bath to ensure even cooking and avoid cracks.
- 🌾 Can I make this gluten-free? Yes, by using gluten-free oats or almond flour for the crust, you can enjoy this as a gluten-free delight.
- 🧀 What’s the best type of cream cheese to use? Regular, full-fat cream cheese offers the best results for a rich flavor.
What’s Next? Share Your Cheesecake Creations!
Creating your cheesecake masterpiece is just the beginning. We’d love to see your creations! Share your results and any twists you made on social media, and don’t forget to tag us. Join the conversation and share your tips in the comments below.