

Looking for a quick and satisfying meal that bursts with flavor? Enter the cheesy garlic chicken wraps! Perfect for a cozy dinner or a light lunch, these wraps are filled with savory chicken, creamy cheese, and aromatic garlic. Not only are they delicious, but they also come together in no time, making them an ideal choice for busy weeknights. Let’s dive into how to elevate your meal game with this delightful recipe.
Ingredients
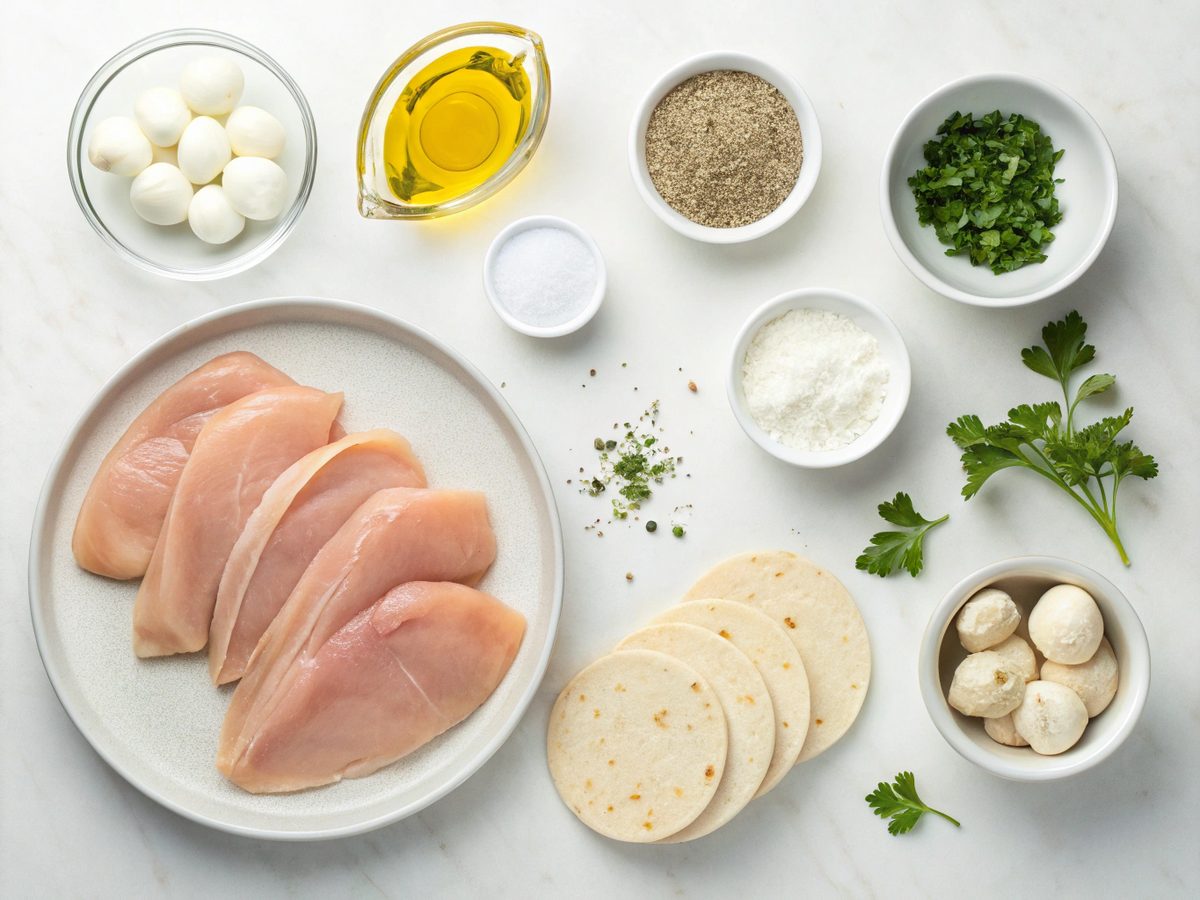
- 2 chicken breasts
- 1 tablespoon olive oil
- 2 teaspoons garlic powder
- Salt and pepper to taste
- 1 cup shredded mozzarella cheese
- 1/4 cup parmesan cheese
- 4 large tortillas
- Fresh parsley for garnish
Equipments
- Skillet
- Mixing bowl
- Knife
- Measuring cups and spoons
How to Make Cheesy Garlic Chicken Wraps – Step By Step
Step 1: Prepare the Chicken
Begin by heating olive oil in a skillet over medium heat. Season both sides of the chicken breasts with garlic powder, salt, and pepper. Place the chicken in the skillet and cook for about 7-8 minutes per side, or until the chicken is golden brown and fully cooked through. Remove the chicken from the skillet and let it rest for a few minutes before slicing it thinly.
Step 2: Mix the Cheeses
While the chicken rests, mix together the mozzarella and parmesan cheeses in a small bowl. This will create a savory, cheesy filling that blends perfectly with the seasoned chicken.
Step 3: Assemble the Wraps
Lay each tortilla flat on a clean surface. Spread an even amount of the cheese mixture across the center of each tortilla. Then, top the cheese with sliced chicken. For added freshness, sprinkle some finely chopped parsley over the chicken.
Step 4: Fold and Cook the Wraps
Carefully fold the sides of each tortilla over the filling, then roll them up tightly into a wrap. Using the same skillet you cooked the chicken in, place each wrap seam-side down and grill over medium heat until the tortillas are crispy and golden, about 3-4 minutes per side.
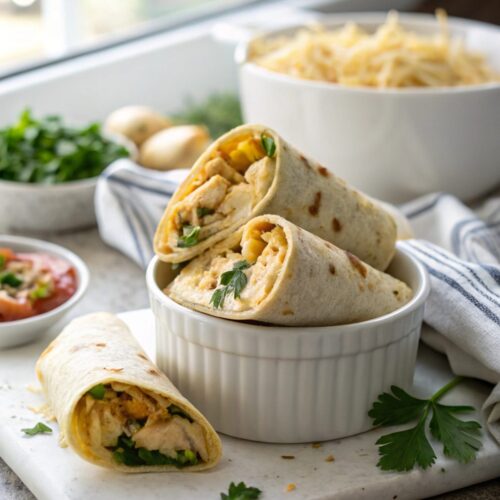
How to Serve Cheesy Garlic Chicken Wraps
These cheesy garlic chicken wraps are best served warm, ensuring the cheese remains gooey and the chicken is juicy. You can pair them with a fresh green salad or a side of roasted vegetables for a complete meal. They also make a fantastic portable lunch option, perfect for enjoying on the go!
Recipe Success Tips & Suggestions
For a juicier chicken, try marinating the breasts in olive oil, garlic, and a splash of lemon juice for an hour before cooking. You can add more flavor by incorporating herbs like thyme or rosemary into the marinade. Additionally, experiment with different types of cheese like sharp cheddar or gouda for a unique twist on the classic flavor profile.
High-Protein Cheesy Garlic Chicken Wraps
If you’re focusing on upping the protein content, consider using whole wheat or high-protein wraps to boost nutritional value. Opt for organic, pasture-raised chicken breasts as they tend to contain more protein. Furthermore, you can enrich your wraps further by adding a layer of Greek yogurt or cottage cheese, which are both protein-rich options that contribute to the overall creaminess.
Low-Carb Cheesy Garlic Chicken Wraps
For a low-carb version of these wraps, substitute the traditional tortillas with leafy greens like iceberg lettuce or collard greens. This simple swap significantly cuts down on carbohydrates while maintaining a refreshing crunch. You can also add veggies like bell peppers and zucchini to bulk up the wrap without adding extra carbs, making it a perfectly wholesome meal.
Storage Instructions
These wraps are excellent for meal prepping. Simply wrap them individually in aluminum foil or airtight containers and store them in the refrigerator for up to 3 days. For longer storage, consider freezing assembled, uncooked wraps. When ready to enjoy, let them thaw overnight in the fridge and grill them before serving to retain the lovely crispy texture.
FAQs
- Can I use different types of cheese? Absolutely! Feel free to experiment with cheddar, gouda, or any other cheese you enjoy for a different flavor.
- How do I know when the chicken is done? The chicken should be golden brown outside and have an internal temperature of 165°F (75°C).
- Can I make these wraps vegan? You can substitute chicken with grilled tofu and use vegan cheese for a plant-based version.
- What other spices can I use? Consider adding paprika, cayenne, or Italian seasoning for an extra kick of flavor.
- Are there any dipping sauces that pair well with this? Marinara, ranch, or a garlic aioli work beautifully with these wraps.
Wrapping Up: Get Creative and Enjoy!
Cheesy garlic chicken wraps are versatile, delicious, and perfect for any occasion. Feel free to customize them to suit your taste preferences and culinary creativity. If you enjoyed this recipe, let us know in the comments below, and don’t forget to share the delight with your friends and family. Happy cooking!
Cheesy Garlic Chicken Wraps
Ingredients
Main Ingredients
- chicken breasts
- olive oil
- garlic powder
- salt and pepper
- shredded mozzarella cheese
- parmesan cheese
- large tortillas
- fresh parsley
Instructions
Steps
- Begin by heating olive oil in a skillet over medium heat. Season both sides of the chicken breasts with garlic powder, salt, and pepper. Place the chicken in the skillet and cook for about 7-8 minutes per side, or until the chicken is golden brown and fully cooked through. Remove the chicken from the skillet and let it rest for a few minutes before slicing it thinly.
- While the chicken rests, mix together the mozzarella and parmesan cheeses in a small bowl. This will create a savory, cheesy filling that blends perfectly with the seasoned chicken.
- Lay each tortilla flat on a clean surface. Spread an even amount of the cheese mixture across the center of each tortilla. Then, top the cheese with sliced chicken. For added freshness, sprinkle some finely chopped parsley over the chicken.
- Carefully fold the sides of each tortilla over the filling, then roll them up tightly into a wrap. Using the same skillet you cooked the chicken in, place each wrap seam-side down and grill over medium heat until the tortillas are crispy and golden, about 3-4 minutes per side.